6.04.2011

Garde Manger Re-Visited: The Return to the Amuse Bouche

In September of 2010, I returned to the kitchen and became, officially again, a cook by profession. On the outside, it was a quiet homecoming, but inside, it was a great, explosive feeling to again be "at home" with the job that I do everyday.

Since then, it has been a fast-paced whirlwind as I move from station to station, one moment preparing banquets, the next making creme anglais, the next cooking fish for the lunch crowd, and the next whipping up holandaise (praying it doesn't break) for breakfast at 6am. It's fast, it's furious, it's a think-on-your-feet, put-your-game-face-on situation...and I like it.

The sweetest "homecoming" is my latest assignment which is to man the garde manger station. In most kitchens, the garde manger (or pantry) station is entry level to advancing through the different stations of the kitchen. The garde manger station was indeed my first entry to line cooking many many years ago. And so to be back there again really does feel like I've come full circle.


THE RETURN OF THE AMUSE BOUCHE

Amuse Bouche, "amusement of the mouth", is a one bite course aimed to whet the appetite. It should be a flavorful bite so that it wakes up the senses and gets them ready for the meal. As the GM cook, it is my task to create an amuse bouche every dinner service. For a cook this is a fabulous and rare opportunity for a creative outlet and I definitely take advantage of that. I don't know how long my garde manger stint will be this time around, but I decided that I should take a photo of every amuse bouche I get to create this time. Here they are so far:


"Liver & Onion" (chicken liver pate, herb crouton, fried onion, herb oil)


Prawn Salad (marinated tiger prawns, horseradish mayo, red-veined sorrel)
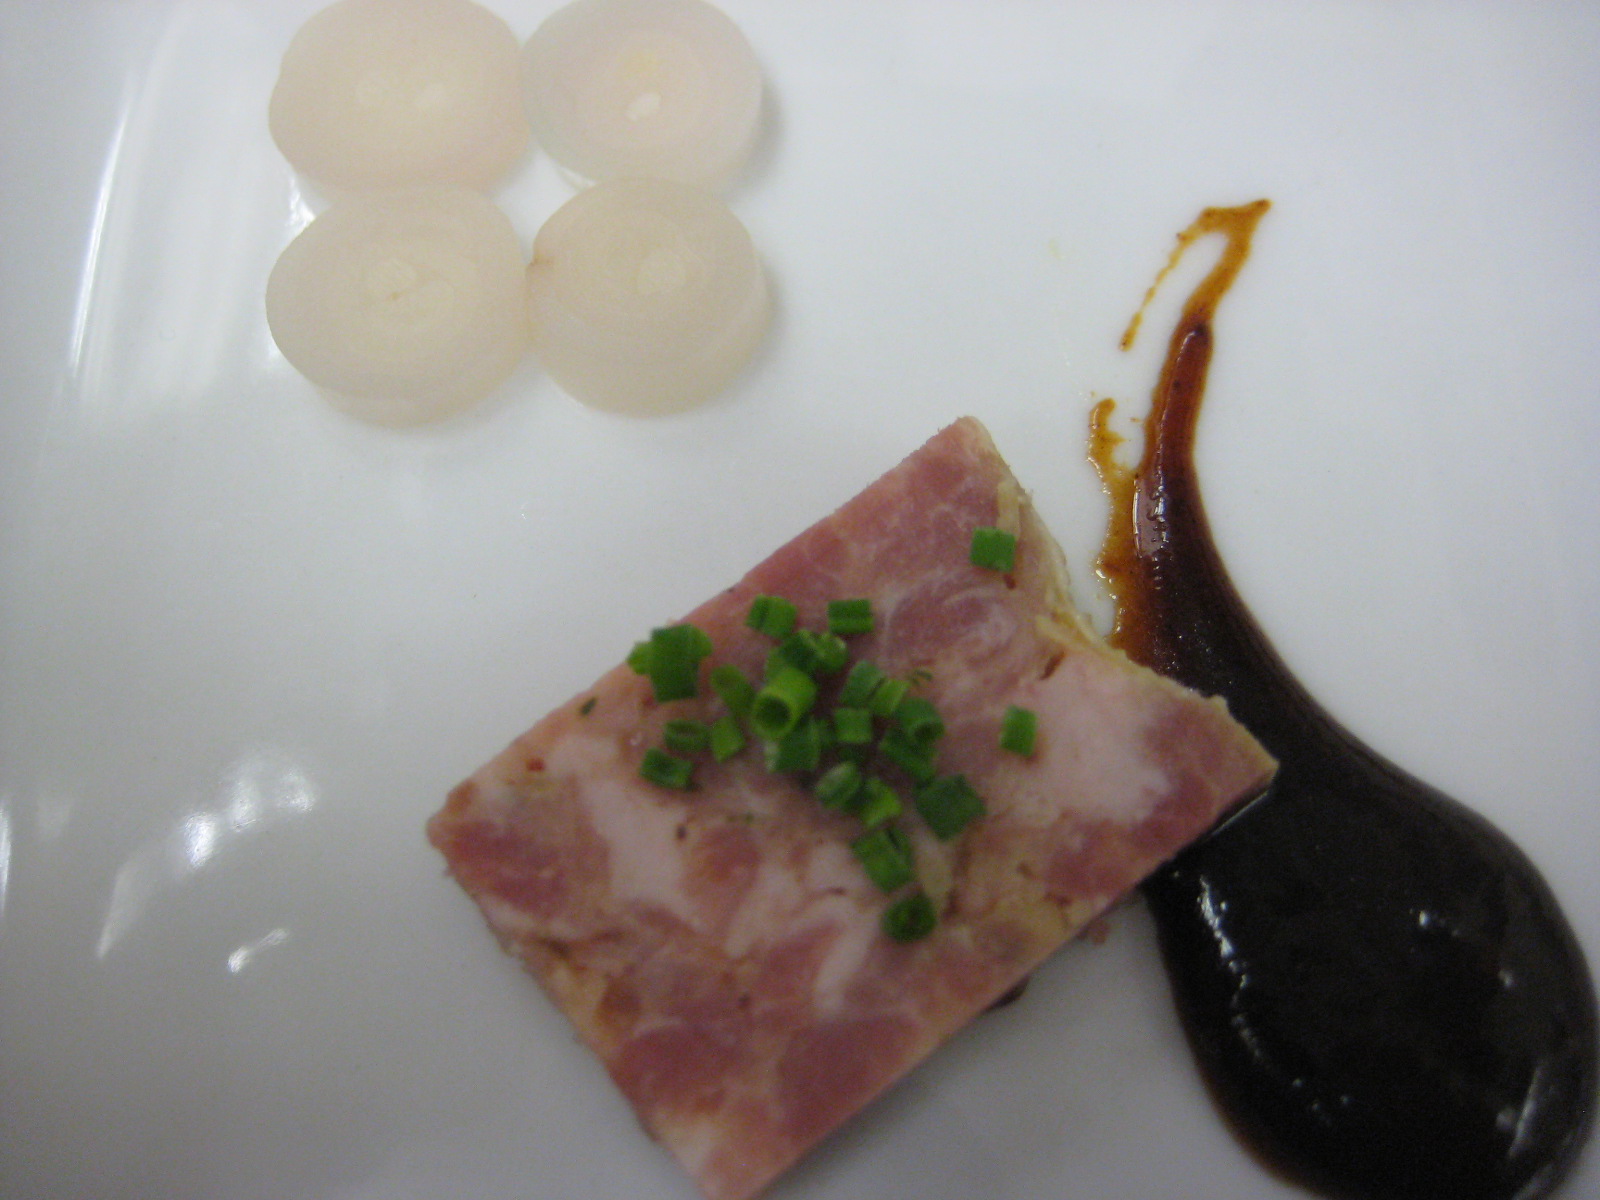

Foie and pork terrine, picked ramps, mosto cotto sauce


Cucumber Sandwich (Gougere, cucumber, goat cheese and pecan disks)


Ahi Tartare (Ahi, mango, daikon, marinated cucumber, oca leaves)

2.26.2011

Tart Treats, part one

I always look forward to looking at a restaurant's dessert menu especially when it has a variety of options to suit all kinds of dessert cravings. I always find myself checking out their "tart" offering. While I don't usually pick the tart dessert over, say, the chocolate one out of a menu, it stll always intrigues me to see if there is something new, other than a lemon sorbet, to be had.

Lately, I've encountered two such intriguing twists to pucker tart treats. The first one is lemongrass bar.

Out of all tart treats, my favorite is a good lemon bar. The basic elements of a lemon bar are a really good lemon curd recipe and a really good base or crust recipe. Once you have these two elements, you can go crazy with your variations and twists. Lemon curd is made when lemon, sugar eggs and a thickening agent (butter or cornstarch or flour) are combined and cooked. On the job, I've made lemon curd many different ways depending on the "house" recipe and every way resulted in a different end product. Some more delicate than others, some creamier than others, others more buttery, others very tart.

Because of lemongrass' properties - the floral note and lemon-like aroma - it is the perfect twist to the traditional lemon bar. The lemongrass bar recipe I encountered in my readings is so inspired that I had to try it. I did not have lemongrass on hand but had lots of ginger and lemons. I thought that a ginger/lemon zest combination comes close to lemongrass' floral-citrus qualities. So my final product is ginger lemon bar with a coconut crust.


Very happy with the results. I've been in search of a reliable lemon curd recipe and found it in this sugar, lemon, flour combination. The result is creamy, tart, spicy and sweet.

Next time, I shall try it with lemongrass.


Crusty creamy and tart. Ginger and lemon go great together


1.18.2011

You scream, I scream, we all scream...

...for ICE CREAM!

Who doesn't like ice cream? It's cold, its creamy, and it can taste like, well anything you want it to.

This MLK weekend the weather suddenly warmed up (la Nina and all that). It was like, 50 degrees Fahrenheit in Seattle in the middle of January! How crazy is that? While a Californian or Floridian might snub, a Seattle-ite makes ice cream!!!!

Left over peppermint candy from last month inspired the flavor of Peppermint-chocolate chip ice cream.

Most home ice cream machines provide recipes for simple milk/cream based, no cook ice cream, but to get that "premium" ice cream taste and texture I recommend starting your base as a custard. It means taking eggs, sugar, milk/cream (or basically half and half) and cooking it low and slow until it is thick enough to coat the back of a silver spoon.

This recipe called for peppermint extract but I instead steeped lots of peppermint candy in my half and half. The only caution in doing this is to make sure to account for the sugar content of the peppermint candy. The candy will melt n your half and half therefore will add sugar to it. I cut down the sugar requirement by a quarter cup which seem to work for me.

One more thing, chocolate chips actually freeze hard which makes it a little difficult to add to ice cream just the way it is. I take chocolate, melt it and then add a little canola oil to the melted chocolate. I spread it onto parchment paper and then freeze it. Once frozen, I can tear it into chocolate pieces before folding the pieces into the churned custard. This way, the "chips" melt in your mouth instead of possibly causing a chipped tooth.

Churn your ice cream for less time than the manufacturer requires so that when you freeze it finally, it is not hard as rock the next day.


Recipe:

1 1/2 cup milk

1 1/2 cup cream

(OR a total of 3 cup half&half to sub milk and cream)

2 ea whole eggs

3 ea egg yolks

3/4 cup sugar (for this recipe do 1/2 cup sugar if steeping candy to the milk/cream (half&half)

Peppermint candy (I did about 1 cup for the 3 cups of liquid - do more for bigger peppermint flavor)

Method:

Heat milk/cream (half&half) with the peppermint candy over low heat.

In the mean time, whisk all eggs and the sugar until light in color.

Once the milk/cream (half&half) just starts to simmer, slowly ladle a bit of it to the egg-sugar mixture while mixing it. This tempers the egg and prevents it from scrambling. Then take that mixture you've tempered and pour back to the pan with the rest of the milk/cream (half&half).

Return to the heat and slowly cook the mixture until thickened and coats the back of a silver spoon.

Chill completely.

Churn

9.28.2010

Cookie Dough

Oh where to start with cookie dough. During my days in the pastry station the cookie was one of those little challenges that I had to master, because in the restaurant we served cookies and we did so everyday on the dot, sometimes a little sometimes a lot. Every customer had his or her own preferences. Some preferred soft chocolate chips or peanut butter cookies, while others liked chunky and chewy double chocolate. In making huge batches at a time, it's best not to screw it up and best to make sure the chocolate chip cookie would turn out just as soft/crisp as it should be, while the peanut butter would be firm enough to hold but soft enough to enjoy.

Cookie dough making is deceitfully simple but consider this:

Cookies are crisp if they are low in moisture while high in sugar and fat.

Cookies are soft if they are high in moisture while low in sugar and fat. Honey, molasses, or corn syrup adds to moistness.

Cookies are chewy if high in sugar, liquid AND EGGS while low in fat. Also, a strong flour or gluten aids in this.

The cookie's spread (when baked) is determined by many things. Cookies spread more if higher in sugar. Baking soda encourages spread. A low oven temperature does the same. How much the butter and sugar have been creamed determines spread. While low sugar, low baking soda, strong flour decreases spread.

Baking cookies at high temps for a short time is ideal. Yet you still have to determine how much you want the cookie to spread (lower oven temp) and how much you want it to hold it's shape (higher oven temp).

All things considered, a nicely done cookie is a nice treat. Over the years in the various kitchens where in I've been a pastry cook/chef, I've picked out personal favorite recipes. Practice makes nearly perfect and once you've determined the perfect temperature, perfect time, and perfect taste for your dough, it's well worth it all.


In the mixer, peanut butter cookie dough.


375 degrees F, non stick pan, tablespoon full


Thin layer of crispness on the outside, soft and cake-like inside.


8.30.2010

Beef Stew

So, we've been told that our "stuff", the ones we shipped by sea from the UK, will not arrive for another week, which means after customs and everything, we may finally get them, but not until maybe two more weeks. This leaves us close to two months pot and pan-less. In the mean time, we long for something to eat other than take-out or stir-fry (we'd bought a wok for good measure, and for nearly a month now have used it to make virtually everything we ate.). So, we finally gave in and bought a pot and a pan. Never have I been this excited about cooking vessels. So, with a nice pot on hand, I was finally able to cook us a non-stir fried meal, and beef stew it was.

Beef shoulder was what I had handy but the tougher cuts of the beef are typically utilized. The idea of a braise or a stew is that the slow and low cooking way tenderizes even the toughest cut of meat.

Basic method requires the quick browning of meat to nicely seal it, followed by the sauteing of aromatics such as onions, carrots, and celery, followed by the addition of a tomato product (paste, sauce or tomato itself), and the de-glazing of the pan using acid like wine, citrus, vinegar, or even soy sauce. Then with the meat added back, and other desired vegetables added in, pour your beef stock, vegetable stock, or even just water to just cover the products. Place the lid on and very slow cook the stew on the stove or in the oven at very low temps.

Mine took an hour and a half and came out rich and thick. The beef was tender and so were the vegetables.

With stews and braises, your patience and care really pay off. The meal is hearty, healthy and filling.


Brown the meat to seal in flavor.


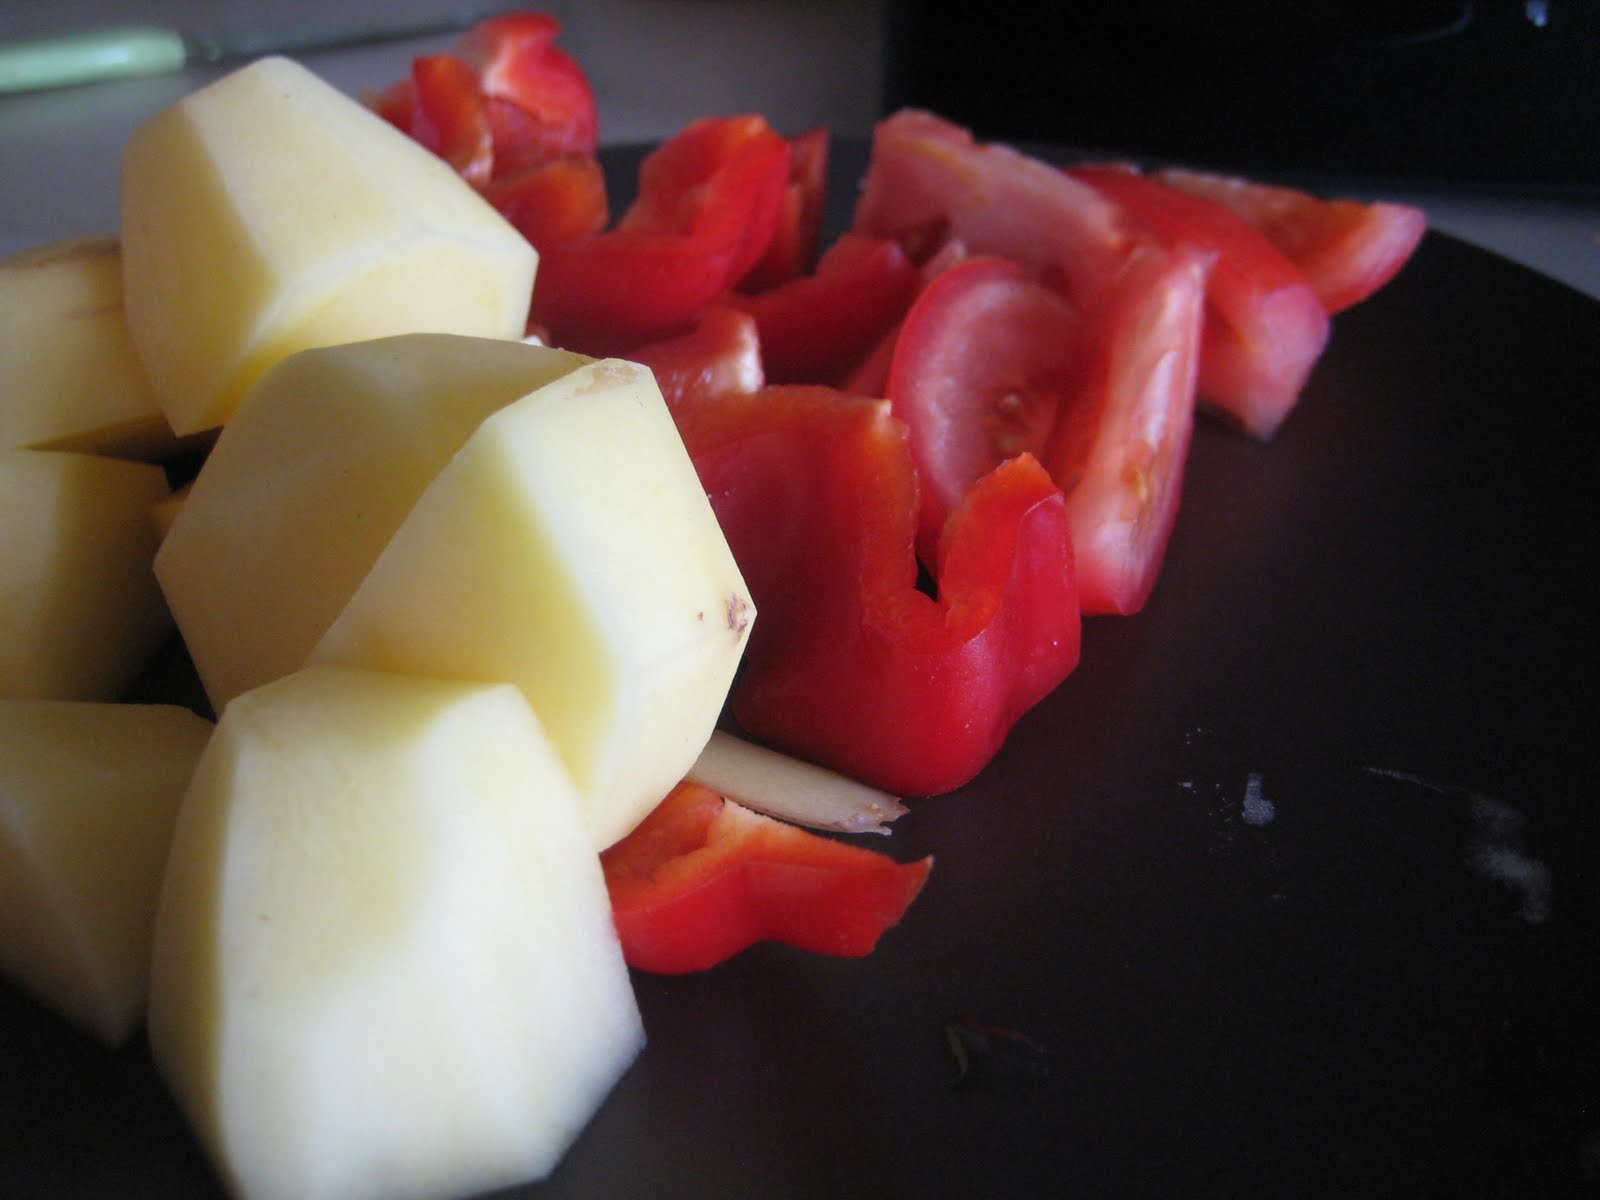
Yukon gold potatoes and red bell peppers went in.


De-glazed with pure cane vinegar.


I coated my meat with flour before browning, it creates a nice brown coat to the meat.


Finished product.


Spoon full of goodness.

8.13.2010

How to make Banana Bread Without a Scale, Measuring Cup and Spoon

We've just been through a big move from one continent to another and, because of that, all kitchen equipment are out at sea, and any week now, should finally make their way to our shores. In the mean time, we stocked up on bananas and as they do, they all have become over ripe. Banana bread-making was inevitable but the dilemma is the lack of baking tools and utensils. However successful baking is still possible. Kids, I hope you paid attention to math and fractions in school as they do come in handy every so often.

Recipe:
2 c. (about 4 lg.) well-mashed over ripe bananas
1 c. sugar
2 eggs
3/8 lb. (1 1/2 sticks) unsalted butter, melted and cooled
2 c. all-purpose flour
2 tsp. baking soda
3 tbsp. buttermilk
1 c. coarsely chopped pecans, dry roasted

So while that's easy enough, without the measuring cups and spoons and even the scale, it can be a challenge.

In culinary school the baking text book we worked out of had three sets of recipes for every baked good we learned to make: US (ounce, pounds), Metric (liter, grams), and % (percentage).  Professional bakers might ask what percentage of this recipe is flour ? or what percentage is sugar ? That is because baking recipes are based on ratios. If you get really good at it, you might be able to eventually tell what the consistency or texture, or taste of the product is supposed to simply be based on percentages of ingredients.
 
So, to analyze our recipe above, if we use our sugar as our base (1 cup is easy to visualize), we know that we need twice as much banana, twice as much flour, and the same amount of nuts as the sugar. The butter and eggs measurement are easy enough so we don't have to worry about them. Finally, feel free to use a dessert spoon as your teaspoon measure. It's close enough.

In other words, go ahead and use your coffee cup, a Tupperware container, or whatever you have handy. As long as you use the same exact container/cup to measure all your ingredients and as long as your proportions are correct, you can't fail.

However, I'm sure you have the proper tool to do the job, so have at it and happy baking. My banana bread turned out just fine. Crusty exterior and spongy interior, moist and full of banana flavor.


Out of the oven, it's a sigh of relief that the recipe worked using nothing but a coffee cup and a dessert spoon to measure things out.


Banana bread, side of butter.


7.07.2010

Strawberry Sorbet

The fresh and plentiful strawberries we've been able to pick from the garden this year needed to be utilized. Meanwhile, the consistently nice and hot weather inspires cool, no-fuss treats.


At times like this, I really miss the old ice cream machine that can churn any custard or sorbet base into creamy or fruity treats. However, with some patience and a little sorbet basics knowledge, it's not too hard to come up with a no churn sorbet recipe.
Sorbet is, in its basic form, frozen sweetened fruit juice or puree helped by a stabilizer (like glucose, corn syrup or egg whites) and by the movement of the said juice/puree during the freezing process. The reason your ice cubes get solid frozen but your sorbet does not is due to these elements. The sugar lowers the freezing point of sorbet preventing the mixture from becoming completely solid. The stabilizer decreases the size of ice crystals, creating a smoother texture. Finally, stirring your sorbet mix at certain points during the freezing process, breaks down the ice crystals even more. The type of juice you make your sorbet out of can also play a part in the final texture of the product. Fruit juice is widely used especially for making orange or lemon sorbets and definitely require a stabilizer, while a nice puree of strawberries or raspberries can result in a smooth, richer product even without stabilizers. The idea then is to make a sorbet "base" with a balance of these elements.

This is my loose recipe for Summer Strawberry Sorbet that requires no ice cream machine:
2 cups strawberry puree - To make puree take your fresh fruit and place straight into your food processor, puree until smooth.

1/4 cup basic sugar syrup - To make, take 1 cup sugar to 1 cup water and boil it for about 10 minutes. Cool the syrup down completely before use. Use only the recipe amount and set the rest aside for future use. (YOU CAN ADJUST SUGAR SYRUP AMOUNT TO YOUR DESIRED SWEETNESS BUT DO NOT EXCEED 1/2 CUP MAX. TOO MUCH SUGAR PREVENTS SORBET FROM FREEZING)

1 Tablespoon glucose or light corn syrup

Mix all ingredients together and place in a freezable container. Put container in freezer. After 20 minutes remove from freezer and stir with a spoon. Return to freezer. After another 15 minutes, stir again, and do so one more time after another 10 minutes. Leave in freezer another 30 minutes and the sorbet should be ready.


The resutling sorbet is smooth and rich. On day two, I had to refresh it because it turned a little more solid. To refresh, I simply scraped desired amount and gave it a stir until it's became smooth again. Then scoop to serve.

Sans Rival

  A very French name for a very Filipino dessert. As a kid sansrival was such a treat. So decadent, so buttery, salty, chewy, and crisp. Whi...