10.30.2021

Sans Rival


A very French name for a very Filipino dessert.

As a kid sansrival was such a treat. So decadent, so buttery, salty, chewy, and crisp. While most Filipino desserts had glutinous characteristics ( we inherited that from our southeast Asian neighbors) sansrival stood out as very European. As a little kid in a bakery in Manila, the world became bigger and very tasty because of desserts like this. And only when I started studying food did I make the technical connections to desserts like Merveilleaux or Pavlova, all of which I love to eat! Sansrival, though, is of course, my special “happy-evoking” version.  

There are so many versions of Sansrival’s origin. From the name (Sans Rival, lit. “unrivaled”) it seems rooted in France, yet some say it’s the Spaniards version of a Russian Imperial torte. Others write that in the 1920’s after Filipinos returned from travel to Europe, they started introducing cooking techniques they learned while living in Europe.  I like to think that the Filipino sense of humor named it Sans Rival as an answer to and play on the Belgian dessert, merveilleaux which translates to great, marvelous, wonderful. 

Recipe:

Yield - 6-inch round with 4 layers of meringue. This dessert is so decadent that it’s enough for 8 to 12 mini slices. 

Meringue:

2 cups cashew nuts, toasted and cooled

4 ea egg whites 

1/4 tsp cream of tartar 

1/3 cup sugar

1/2 tsp vanilla extract

1/4 tsp salt

Preheat your oven to 325 F.

Draw four 6-inch circles on parchment paper and use it to line your baking sheet.

Using a food processor, pulse the cashews and set aside 1 cup of larger chopped pieces. Continue to process the remaining cashews into very fine sand consistency. This is your cashew flour.

Combined egg whites and cream of tartar in a mixing bowl with the whisk attachment and whip until frothy. Then gradually add the sugar a tablespoon at a time and continue to whip until you reach stiff peaks.

Carefully fold in the cashew flour, salt, and vanilla extract keeping the mixture light and airy and not deflated.

Transfer meringue into a piping bag with a large round tip and begin to pipe meringue circles filling each circle you drew to make disks. These will be your layers so make them as even as possible. 

Bake your meringue disks for about 20 to 25 min until they are golden brown. Cool.

French buttercream:

This is a double batch to ensure you have plenty to layer and ice with.

8 each egg yolks

1 cup sugar

1/3 cup water

2 cups  butter

Place yolk in a mixer with the paddle attachment. Beat the eggs about 5 minutes until light in color.

Place your sugar and water in a small sauce pan. Do not mix. Heat at medium low and when the sugar is fully dissolved and bubbles up in the middle, take off heat and slowly tricke onto the egg yolks while continuing to beat. 

After all the hot syrup is added, continue to beat the mixture until it cools down to room temp. Gradually add the butter a tablespoon at a time. Keep beating and don’t worry if it separates, just keep beating until the buttercream comes back together. 

Assembly:

Start with the meringue, then layer with buttercream, then sprinkle the rough chopped cashews, then top with the meringue and repeat the layering. Once you’ve topped with the last meringue, ice your sansrival with the buttercream and finish with the chopped cashews.

Refrigerate so set for 3 hours.

You can also freeze the sansrival. In fact it is delicious as a frozen treat. 


3.03.2020

Sky’s the Limit with a Good Shortcrust


One of my favorite things to make and eat is pie, and all forms of it.  And what better recipe to have in your back pocket than a reliable shortcrust.  

A shortcrust or short dough is 100% flour to 50% butter (in other words twice the amount of flour to butter), seasoned with salt, some sugar, any spice you want, and cut with water. My variation contains an egg yolk per 1 3/4 cup of flour.  The yolk , gives it a little elasticity, perfect for these personal pies pockets with curried vegetables (photo).  This pastry is delicate but strong to contain and hold in your favorite filling, and it stays buttery and flakey when baked.

Shortcrust:

Part of the fun is making this dough by hand. Use your hands to get the feel for when the dough is just right. 

1 3/4 cup   AP flour 
5 1/2 oz.    Cold Butter, grated
Pinch         Salt
1Tbl           Sugar
1/3 cup      Water 
1 each.       Egg Yolk

Combine flour and salt.
Cut the butter into the flour until the consistency is that of medium grain sand.
Add the water and yolk and in the beginning use a wooden spoon to stir. 
Then with your hands form the dough.
Knead for about 5 seconds to form a smooth ball. Then wrap with plastic wrap and rest at room temp for 10 minutes.

For personal pies or empanadas:
( yield depends on the size of the stamp or cut)

Using a rolling pin, roll the dough to about 1/4-inch thickness.
Stamp or cut as desired.
Fill with your choice of filling and use an egg wash to seal.
Brush the dough with more egg wash.
Bake at 375 degrees Fahrenheit for about 15 minutes or until the pastry is golden brown.


8.05.2019

Sourdough Starter Pancakes

If you don’t want to throwing away your starter “discard”, make pancakes! I experimented a few times on the measurements, and finally arrived at an easy, breezy recipe. The recipe worked well when my starter was just a few weeks old, but works even better now, after 2 months of feeding and discarding.

Sourdough Starter Pancakes
Yield: 6 4” rounds

1 cup        Un-fed sourdough starter
1/2 cup     Milk
1 each      Egg, whole
1 tsp.        Sugar
1/4 tsp.     Salt
1/2 tsp.     Baking soda
1/2 cup     All-purpose flour

Place starter in a bowl.
Into a measuring cup, measure milk, add eggs, sugar, salt and beat until combined.
In a small bowl, whisk together flour and baking soda.
Now, add your wet ingredients from the cup and dry ingredients from the small bowl into your starter and whisk.
Cook as you would pancakes.

Enjoy your morning!


7.14.2012

Hand Made Ho Fun Noodles

My latest culinary light bulb moment happened very recently while watching a cooking show on TV. The chefs were making a Chinese noodle dish but quickly made a point to say that they made their own ho fun noodles!!! They very quickly mentioned ingredients, proportions  and methodology but not a recipe.  I had to feed the curiosity and researched this and, man oh  man, making ho fun noodles is dead simple.  I highly recommend at least trying making it for yourself:

My recipe for hand made ho fun noodles:

First set up a steamer system that will fit a flat surface (your largest pot with water and a glass or non stick baking tray or sheet over it, tin foil or lid to cover your tray)

Mix together 1/2 cup rice flour to 1 cup water and 2 tsp tapioca starch or corn starch. This mixture should be very liquid so if it is to thick add water.

Grease your tray (very important) and pour a very thin layer of the mixture onto your tray and steam for 8 minutes. Remove from steamer and grease top of this now set sheet of noodle. Roll the sheet and cut noodles to create the ho fun noodles.


Ho Fun Noodles in a Noodle-Egg-Albacore salad

7.07.2012

Catering for a Friend

This past weekend, a friend and former kitchen colleague had a beautiful wedding ceremony at a gorgeous puget sound location. The night before, I had the honor of catering the rehearsal dinner for  her very close friends and family.

For many years, I have assisted many chefs in their catering gigs even back when I was just a culinary student.  Catering has it's many quirks. Each event is unique, each site is different and has it's own challenges to overcome and compensate for. 

Yet with challenges and uncertainties, and time not being on my side, the vision was realized.  We were lucky to arrive to a gorgeous water-side house with a fully loaded kitchen, and with a plan, managed to put out the menu without a glitch.

It is a special feeling to have accomplished something of my own - with the help of a couple of supportive friends - but still my own in concept, recipes, flavor profiles, direction, and execution.  It's a true high.

Here are some images:

Theme:  Casual, Family Style BBQ
Menu:

Roasted Vegetables finished with balsamic vinaigrette

Slow Roasted Brisket, Warmed Coleslaw, Pickled Onions, Tomato Jam (not pictured), 
Spicy bbq sauce
Grilled Chicken Breast, Summer Vegetables, Tangy bbq sauce

Quinoa and Black Bean Salad with Chipotle Vinaigrette
Herbed Corn Bread

Lemon Merengue Tartlettes
Strawberry-Raspberry Galette
Rhubarb Shortbread

2.28.2012

Garde Manger, The Art of Scavenging


Compressed watermelon and heirloom tomato "salad" in balsamic oil


"The person responsible for working with cold food, or the station preparing the cold food in restaurants, is called garde-manger. Often left-overs or unused meats, fish, and vegetables from various parts of the kitchen are funneled to garde-manger station. Sometimes the garde-manger is meant to hunt scraps on his or her own and must be a deft scavenger. The term itself means to keep what is to be eaten." (Excerpt from the book "The Soul of a Chef" by Michael Ruhlman).

Although the modern day garde-manger or the pantry cook is often seen as the soup and salad guy/girl, the original skills and purpose of the garde-manger still applies to the kitchen I work in. What I've learned from manning this station is the true art of scavenging, turning parts of meats, starches, vegetables, and fruits into something presentable and tasty. Here are more images of things scavenged, re purposed, and presented in the dining room:


Salt, brown sugar and fennel cured salmon belly turned to Lomi-lomi salmon, dressed in sesame oil, with tomato, red onion, kaiwari sprouts and crisp fried rice paper.

Bacon-sesame brittle over hazelnut crusted chevre
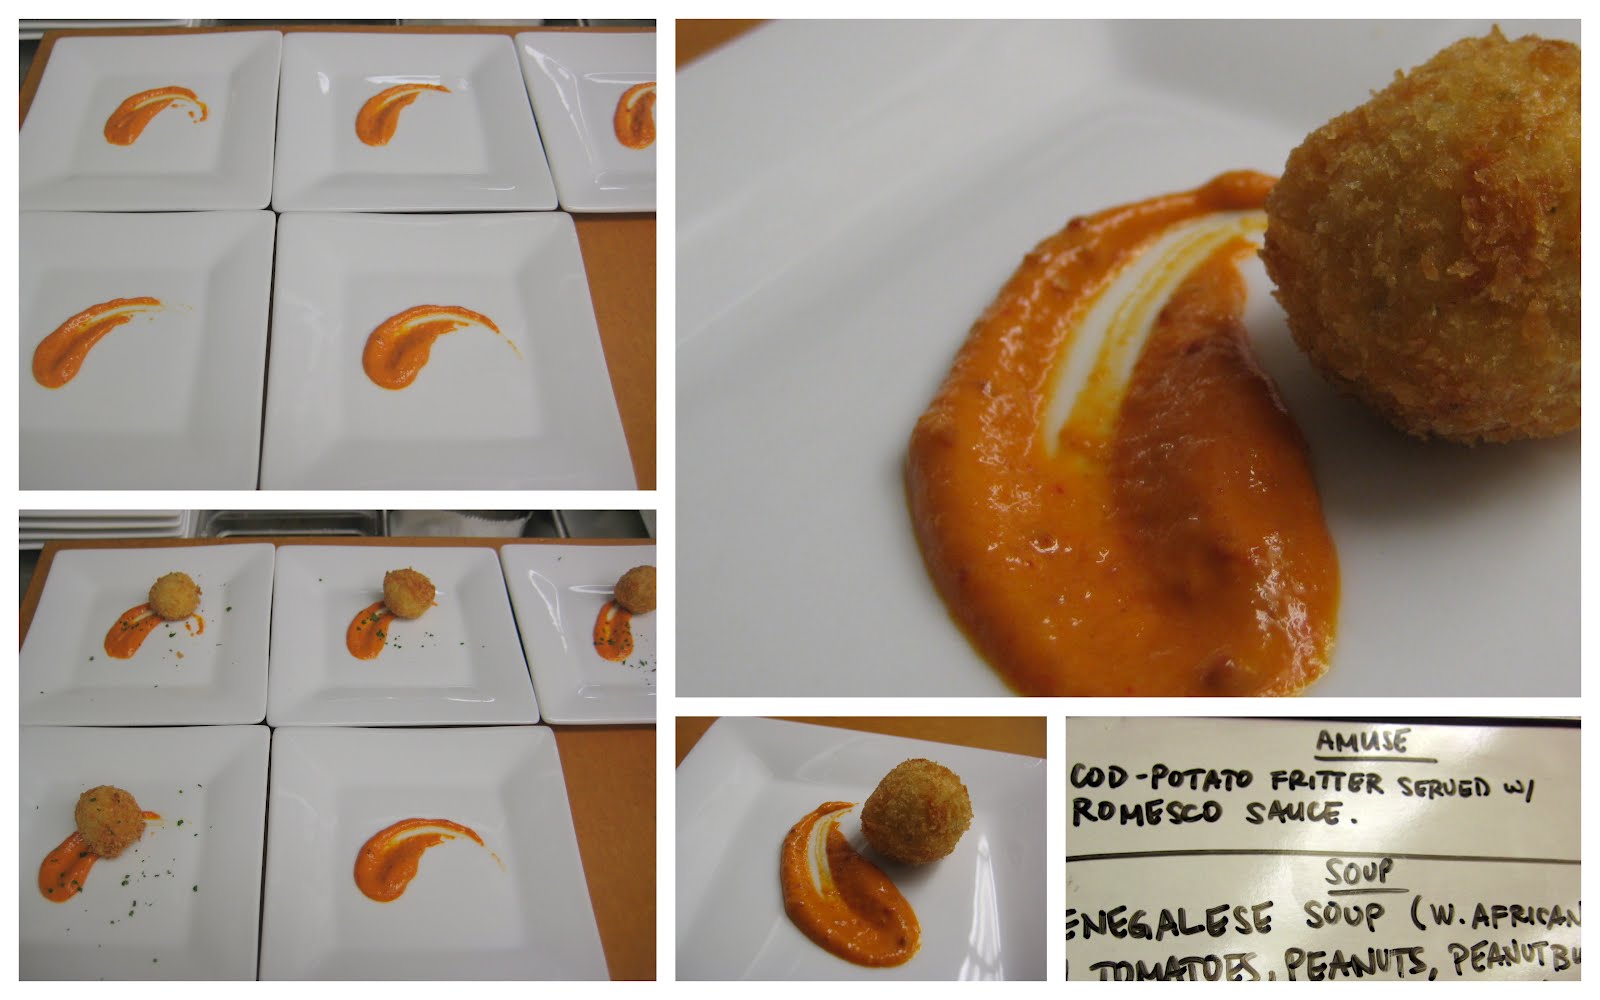
Brandade (cod cheeks and collar, potatoes) turned to fritters with romesco sauce.

7.10.2011

Tart Treats, part 2

The second tart treat I've been excited about is the LEMON POSSET. Lemon posset is not so popular here in the states, but it is a pretty common offering in British restaurants. I had my first posset at The Warehous Cafe in Birmingham England.


Posset or Poshotte was, from Medieval times, a hot drink of milk curdled with wine or ale. The modern lemon posset is a smooth, creamy cold custard similar to a panna cotta. By default it is a citrus dessert because the acid in lemon juice is the component that sets (curdles) the custard. There is no egg yolk, nor gelatin at all but simply lemon juice. I suppose you can try the recipe with orange juice, wine, and even vinegar to achieve the flavor you want.


The posset I prepared is Lemon Posset with raspberry gelee.


The methodology is simple...extremely simple.


The Lemon Posset:


300 ml heavy cream
70 g sugar
2-3 T lemon juice


In a sauce pan bring cream to the boil. Keep boiling for about 3 minutes
Remove from heat and add lemon juice, add more juice to adjust desired tartness
Cool at room temp for about 5 minutes
Place in cups or glasses and in the cooler to set.

I made mine with a layer of raspberry gelee which is optional.


The result is a tart, creamy dessert.


Lemon Posset over Raspberry gelee.

6.04.2011

Garde Manger Re-Visited: The Return to the Amuse Bouche

In September of 2010, I returned to the kitchen and became, officially again, a cook by profession. On the outside, it was a quiet homecoming, but inside, it was a great, explosive feeling to again be "at home" with the job that I do everyday.

Since then, it has been a fast-paced whirlwind as I move from station to station, one moment preparing banquets, the next making creme anglais, the next cooking fish for the lunch crowd, and the next whipping up holandaise (praying it doesn't break) for breakfast at 6am. It's fast, it's furious, it's a think-on-your-feet, put-your-game-face-on situation...and I like it.

The sweetest "homecoming" is my latest assignment which is to man the garde manger station. In most kitchens, the garde manger (or pantry) station is entry level to advancing through the different stations of the kitchen. The garde manger station was indeed my first entry to line cooking many many years ago. And so to be back there again really does feel like I've come full circle.


THE RETURN OF THE AMUSE BOUCHE

Amuse Bouche, "amusement of the mouth", is a one bite course aimed to whet the appetite. It should be a flavorful bite so that it wakes up the senses and gets them ready for the meal. As the GM cook, it is my task to create an amuse bouche every dinner service. For a cook this is a fabulous and rare opportunity for a creative outlet and I definitely take advantage of that. I don't know how long my garde manger stint will be this time around, but I decided that I should take a photo of every amuse bouche I get to create this time. Here they are so far:


"Liver & Onion" (chicken liver pate, herb crouton, fried onion, herb oil)


Prawn Salad (marinated tiger prawns, horseradish mayo, red-veined sorrel)


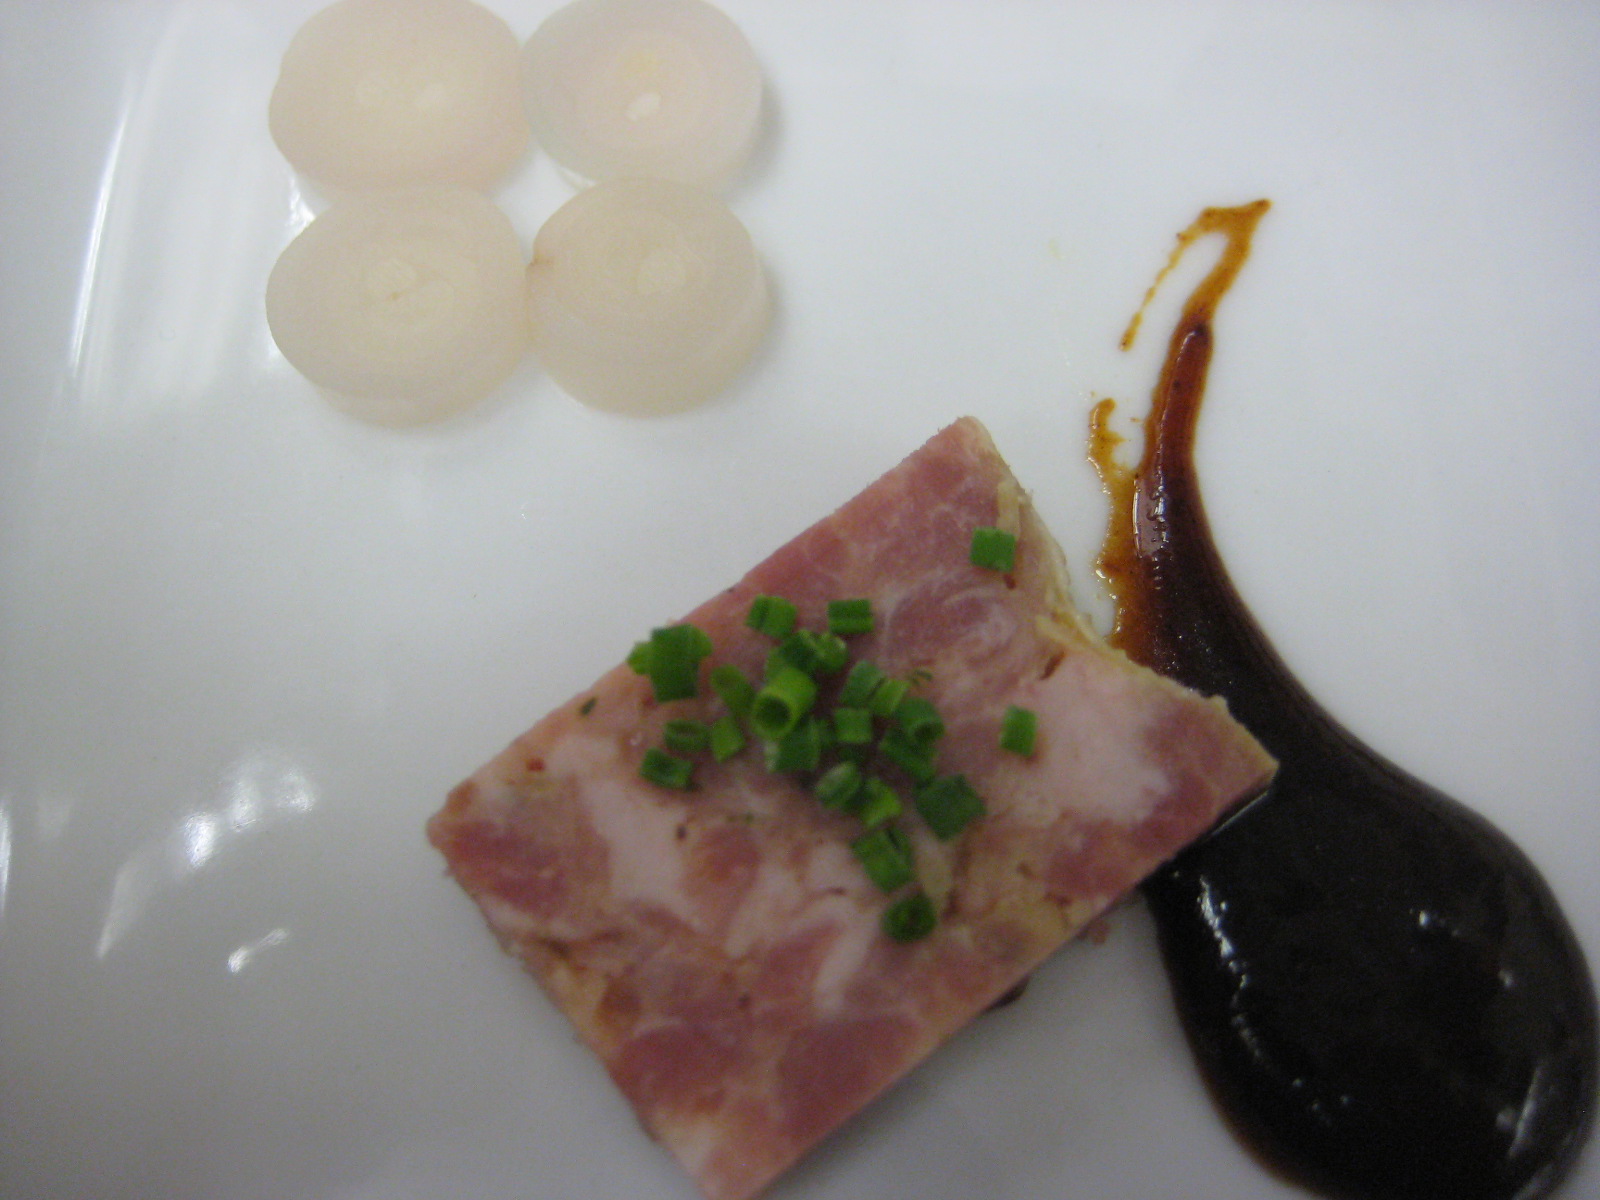
Foie and pork terrine, picked ramps, mosto cotto sauce


Cucumber Sandwich (Gougere, cucumber, goat cheese and pecan disks)


Ahi Tartare (Ahi, mango, daikon, marinated cucumber, oca leaves)

2.26.2011

Tart Treats, part one

I always look forward to looking at a restaurant's dessert menu especially when it has a variety of options to suit all kinds of dessert cravings. I always find myself checking out their "tart" offering. While I don't usually pick the tart dessert over, say, the chocolate one out of a menu, it stll always intrigues me to see if there is something new, other than a lemon sorbet, to be had.

Lately, I've encountered two such intriguing twists to pucker tart treats. The first one is lemongrass bar.

Out of all tart treats, my favorite is a good lemon bar. The basic elements of a lemon bar are a really good lemon curd recipe and a really good base or crust recipe. Once you have these two elements, you can go crazy with your variations and twists. Lemon curd is made when lemon, sugar eggs and a thickening agent (butter or cornstarch or flour) are combined and cooked. On the job, I've made lemon curd many different ways depending on the "house" recipe and every way resulted in a different end product. Some more delicate than others, some creamier than others, others more buttery, others very tart.

Because of lemongrass' properties - the floral note and lemon-like aroma - it is the perfect twist to the traditional lemon bar. The lemongrass bar recipe I encountered in my readings is so inspired that I had to try it. I did not have lemongrass on hand but had lots of ginger and lemons. I thought that a ginger/lemon zest combination comes close to lemongrass' floral-citrus qualities. So my final product is ginger lemon bar with a coconut crust.


Very happy with the results. I've been in search of a reliable lemon curd recipe and found it in this sugar, lemon, flour combination. The result is creamy, tart, spicy and sweet.

Next time, I shall try it with lemongrass.


Crusty creamy and tart. Ginger and lemon go great together


1.18.2011

You scream, I scream, we all scream...

...for ICE CREAM!

Who doesn't like ice cream? It's cold, its creamy, and it can taste like, well anything you want it to.

This MLK weekend the weather suddenly warmed up (la Nina and all that). It was like, 50 degrees Fahrenheit in Seattle in the middle of January! How crazy is that? While a Californian or Floridian might snub, a Seattle-ite makes ice cream!!!!

Left over peppermint candy from last month inspired the flavor of Peppermint-chocolate chip ice cream.

Most home ice cream machines provide recipes for simple milk/cream based, no cook ice cream, but to get that "premium" ice cream taste and texture I recommend starting your base as a custard. It means taking eggs, sugar, milk/cream (or basically half and half) and cooking it low and slow until it is thick enough to coat the back of a silver spoon.

This recipe called for peppermint extract but I instead steeped lots of peppermint candy in my half and half. The only caution in doing this is to make sure to account for the sugar content of the peppermint candy. The candy will melt n your half and half therefore will add sugar to it. I cut down the sugar requirement by a quarter cup which seem to work for me.

One more thing, chocolate chips actually freeze hard which makes it a little difficult to add to ice cream just the way it is. I take chocolate, melt it and then add a little canola oil to the melted chocolate. I spread it onto parchment paper and then freeze it. Once frozen, I can tear it into chocolate pieces before folding the pieces into the churned custard. This way, the "chips" melt in your mouth instead of possibly causing a chipped tooth.

Churn your ice cream for less time than the manufacturer requires so that when you freeze it finally, it is not hard as rock the next day.


Recipe:

1 1/2 cup milk

1 1/2 cup cream

(OR a total of 3 cup half&half to sub milk and cream)

2 ea whole eggs

3 ea egg yolks

3/4 cup sugar (for this recipe do 1/2 cup sugar if steeping candy to the milk/cream (half&half)

Peppermint candy (I did about 1 cup for the 3 cups of liquid - do more for bigger peppermint flavor)

Method:

Heat milk/cream (half&half) with the peppermint candy over low heat.

In the mean time, whisk all eggs and the sugar until light in color.

Once the milk/cream (half&half) just starts to simmer, slowly ladle a bit of it to the egg-sugar mixture while mixing it. This tempers the egg and prevents it from scrambling. Then take that mixture you've tempered and pour back to the pan with the rest of the milk/cream (half&half).

Return to the heat and slowly cook the mixture until thickened and coats the back of a silver spoon.

Chill completely.

Churn

9.28.2010

Cookie Dough

Oh where to start with cookie dough. During my days in the pastry station the cookie was one of those little challenges that I had to master, because in the restaurant we served cookies and we did so everyday on the dot, sometimes a little sometimes a lot. Every customer had his or her own preferences. Some preferred soft chocolate chips or peanut butter cookies, while others liked chunky and chewy double chocolate. In making huge batches at a time, it's best not to screw it up and best to make sure the chocolate chip cookie would turn out just as soft/crisp as it should be, while the peanut butter would be firm enough to hold but soft enough to enjoy.

Cookie dough making is deceitfully simple but consider this:

Cookies are crisp if they are low in moisture while high in sugar and fat.

Cookies are soft if they are high in moisture while low in sugar and fat. Honey, molasses, or corn syrup adds to moistness.

Cookies are chewy if high in sugar, liquid AND EGGS while low in fat. Also, a strong flour or gluten aids in this.

The cookie's spread (when baked) is determined by many things. Cookies spread more if higher in sugar. Baking soda encourages spread. A low oven temperature does the same. How much the butter and sugar have been creamed determines spread. While low sugar, low baking soda, strong flour decreases spread.

Baking cookies at high temps for a short time is ideal. Yet you still have to determine how much you want the cookie to spread (lower oven temp) and how much you want it to hold it's shape (higher oven temp).

All things considered, a nicely done cookie is a nice treat. Over the years in the various kitchens where in I've been a pastry cook/chef, I've picked out personal favorite recipes. Practice makes nearly perfect and once you've determined the perfect temperature, perfect time, and perfect taste for your dough, it's well worth it all.


In the mixer, peanut butter cookie dough.


375 degrees F, non stick pan, tablespoon full


Thin layer of crispness on the outside, soft and cake-like inside.


8.30.2010

Beef Stew

So, we've been told that our "stuff", the ones we shipped by sea from the UK, will not arrive for another week, which means after customs and everything, we may finally get them, but not until maybe two more weeks. This leaves us close to two months pot and pan-less. In the mean time, we long for something to eat other than take-out or stir-fry (we'd bought a wok for good measure, and for nearly a month now have used it to make virtually everything we ate.). So, we finally gave in and bought a pot and a pan. Never have I been this excited about cooking vessels. So, with a nice pot on hand, I was finally able to cook us a non-stir fried meal, and beef stew it was.

Beef shoulder was what I had handy but the tougher cuts of the beef are typically utilized. The idea of a braise or a stew is that the slow and low cooking way tenderizes even the toughest cut of meat.

Basic method requires the quick browning of meat to nicely seal it, followed by the sauteing of aromatics such as onions, carrots, and celery, followed by the addition of a tomato product (paste, sauce or tomato itself), and the de-glazing of the pan using acid like wine, citrus, vinegar, or even soy sauce. Then with the meat added back, and other desired vegetables added in, pour your beef stock, vegetable stock, or even just water to just cover the products. Place the lid on and very slow cook the stew on the stove or in the oven at very low temps.

Mine took an hour and a half and came out rich and thick. The beef was tender and so were the vegetables.

With stews and braises, your patience and care really pay off. The meal is hearty, healthy and filling.


Brown the meat to seal in flavor.


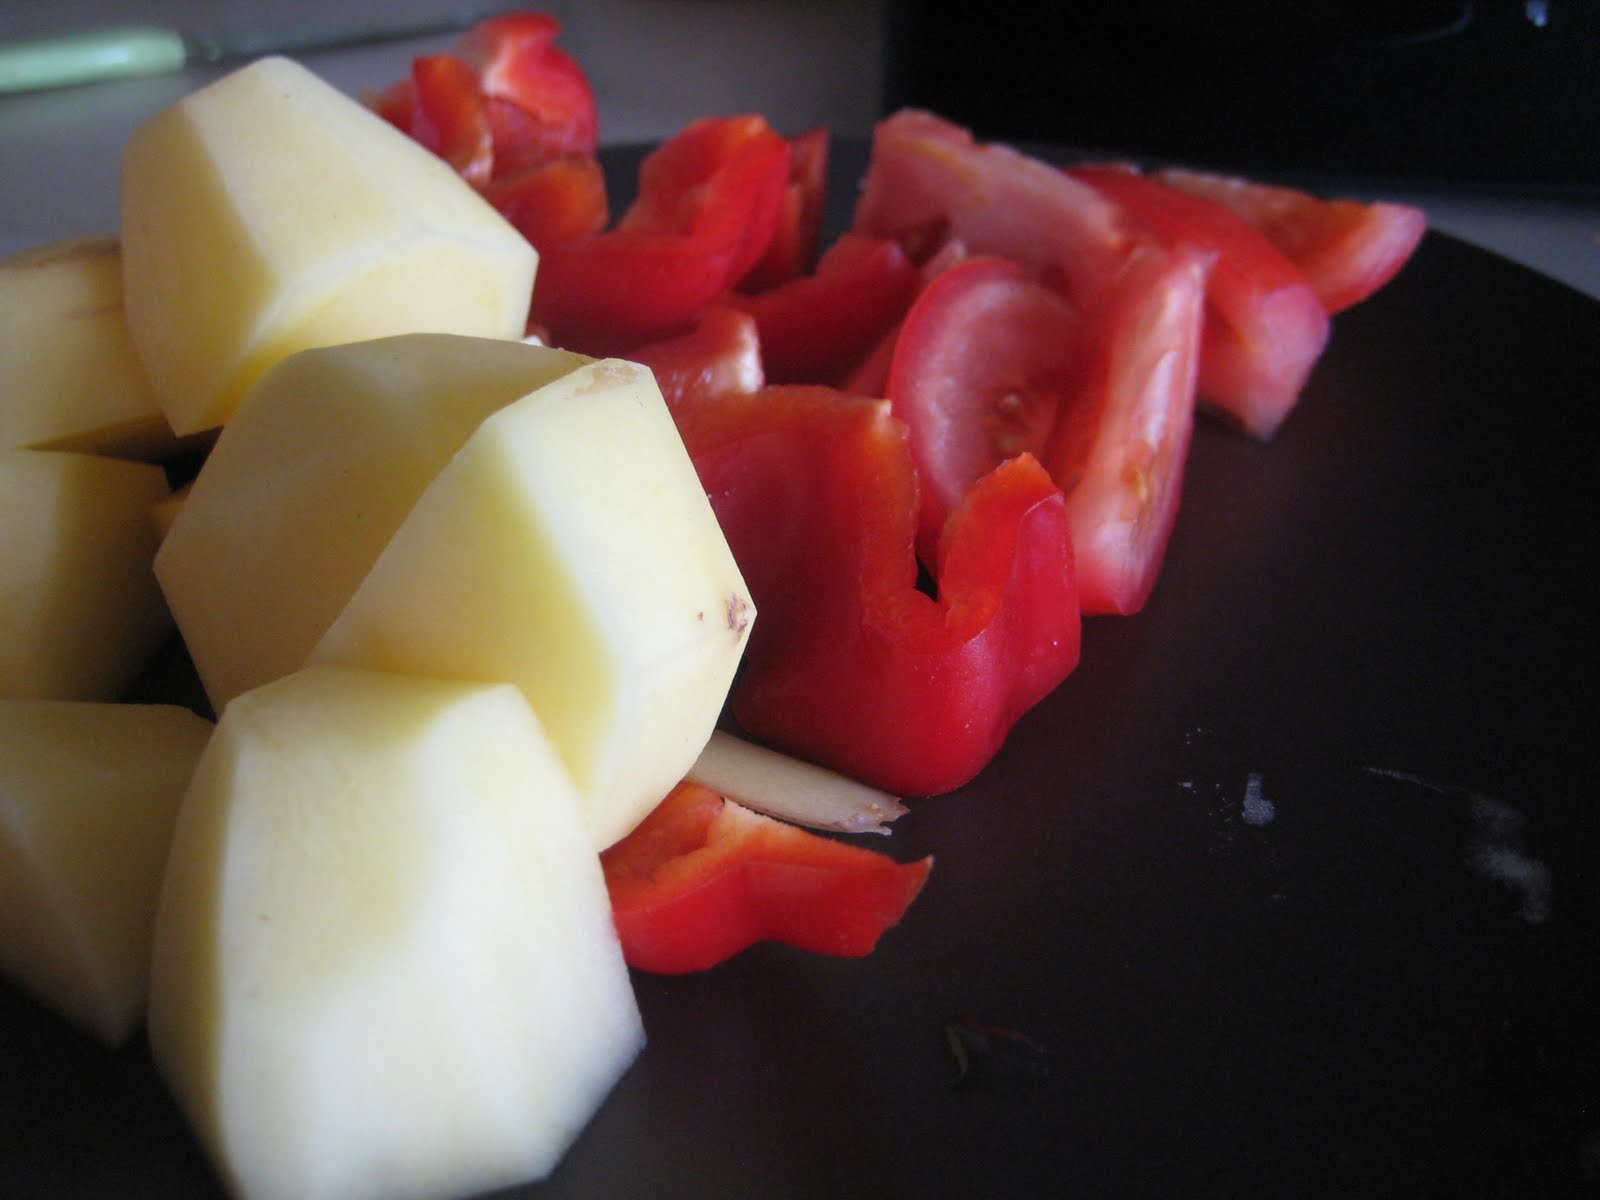
Yukon gold potatoes and red bell peppers went in.


De-glazed with pure cane vinegar.


I coated my meat with flour before browning, it creates a nice brown coat to the meat.


Finished product.


Spoon full of goodness.

8.13.2010

How to make Banana Bread Without a Scale, Measuring Cup and Spoon

We've just been through a big move from one continent to another and, because of that, all kitchen equipment are out at sea, and any week now, should finally make their way to our shores. In the mean time, we stocked up on bananas and as they do, they all have become over ripe. Banana bread-making was inevitable but the dilemma is the lack of baking tools and utensils. However successful baking is still possible. Kids, I hope you paid attention to math and fractions in school as they do come in handy every so often.

Recipe:
2 c. (about 4 lg.) well-mashed over ripe bananas
1 c. sugar
2 eggs
3/8 lb. (1 1/2 sticks) unsalted butter, melted and cooled
2 c. all-purpose flour
2 tsp. baking soda
3 tbsp. buttermilk
1 c. coarsely chopped pecans, dry roasted

So while that's easy enough, without the measuring cups and spoons and even the scale, it can be a challenge.

In culinary school the baking text book we worked out of had three sets of recipes for every baked good we learned to make: US (ounce, pounds), Metric (liter, grams), and % (percentage).  Professional bakers might ask what percentage of this recipe is flour ? or what percentage is sugar ? That is because baking recipes are based on ratios. If you get really good at it, you might be able to eventually tell what the consistency or texture, or taste of the product is supposed to simply be based on percentages of ingredients.
 
So, to analyze our recipe above, if we use our sugar as our base (1 cup is easy to visualize), we know that we need twice as much banana, twice as much flour, and the same amount of nuts as the sugar. The butter and eggs measurement are easy enough so we don't have to worry about them. Finally, feel free to use a dessert spoon as your teaspoon measure. It's close enough.

In other words, go ahead and use your coffee cup, a Tupperware container, or whatever you have handy. As long as you use the same exact container/cup to measure all your ingredients and as long as your proportions are correct, you can't fail.

However, I'm sure you have the proper tool to do the job, so have at it and happy baking. My banana bread turned out just fine. Crusty exterior and spongy interior, moist and full of banana flavor.


Out of the oven, it's a sigh of relief that the recipe worked using nothing but a coffee cup and a dessert spoon to measure things out.


Banana bread, side of butter.


7.07.2010

Strawberry Sorbet

The fresh and plentiful strawberries we've been able to pick from the garden this year needed to be utilized. Meanwhile, the consistently nice and hot weather inspires cool, no-fuss treats.


At times like this, I really miss the old ice cream machine that can churn any custard or sorbet base into creamy or fruity treats. However, with some patience and a little sorbet basics knowledge, it's not too hard to come up with a no churn sorbet recipe.
Sorbet is, in its basic form, frozen sweetened fruit juice or puree helped by a stabilizer (like glucose, corn syrup or egg whites) and by the movement of the said juice/puree during the freezing process. The reason your ice cubes get solid frozen but your sorbet does not is due to these elements. The sugar lowers the freezing point of sorbet preventing the mixture from becoming completely solid. The stabilizer decreases the size of ice crystals, creating a smoother texture. Finally, stirring your sorbet mix at certain points during the freezing process, breaks down the ice crystals even more. The type of juice you make your sorbet out of can also play a part in the final texture of the product. Fruit juice is widely used especially for making orange or lemon sorbets and definitely require a stabilizer, while a nice puree of strawberries or raspberries can result in a smooth, richer product even without stabilizers. The idea then is to make a sorbet "base" with a balance of these elements.

This is my loose recipe for Summer Strawberry Sorbet that requires no ice cream machine:
2 cups strawberry puree - To make puree take your fresh fruit and place straight into your food processor, puree until smooth.

1/4 cup basic sugar syrup - To make, take 1 cup sugar to 1 cup water and boil it for about 10 minutes. Cool the syrup down completely before use. Use only the recipe amount and set the rest aside for future use. (YOU CAN ADJUST SUGAR SYRUP AMOUNT TO YOUR DESIRED SWEETNESS BUT DO NOT EXCEED 1/2 CUP MAX. TOO MUCH SUGAR PREVENTS SORBET FROM FREEZING)

1 Tablespoon glucose or light corn syrup

Mix all ingredients together and place in a freezable container. Put container in freezer. After 20 minutes remove from freezer and stir with a spoon. Return to freezer. After another 15 minutes, stir again, and do so one more time after another 10 minutes. Leave in freezer another 30 minutes and the sorbet should be ready.


The resutling sorbet is smooth and rich. On day two, I had to refresh it because it turned a little more solid. To refresh, I simply scraped desired amount and gave it a stir until it's became smooth again. Then scoop to serve.

7.02.2010

Pearl Onions

Another new addition to our patch were pearl onions. Ours this year grew to be just baby pearl onions but both bulb and leaves were so flavorful that each onion plant was fully utilized. They also emanated a really strong onion scent even while still planted in the ground.


A normal sized onion in the background puts into perspective the size of our baby pearl onions.


We used them in many dishes, and one of the dishes is a simple beef stir fry.

6.30.2010

We've Got Potatoes!

The most exciting gardening lesson for me this year 2010 is the growing of potatoes. Oh the humble potato, the side dish, often times forgotten. Yet it's got the most amazing growth pattern I've ever seen. Planted as chitted tubers, they become leafy plants. Pictured below is a plant at its very early stage. We planted ours on leveled ground so we had to mound dirt every time the plant got taller. The idea is the less exposed the stem, the better the yield.


We watched as our five potato plants ruled our tiny patch, and we often times got frustrated by just how tall and overwhelming the plants were getting. Finally, flowers emerged which was a good sign. We didn't quite know what to really do with them so one day, we thought we'd test harvest one plant. Little did we know how many potatoes already developed underneath the earth. The experience of harvesting was like hunting for treasure. We dug and dug to find a number of potatoes buried in the dirt in random spots. In the end, from merely five plants, we got huge bowl full. Truly gratifying.


Potatoes galore from merely five plants


6.28.2010

Pork Roulade with pears, apples, and sage

Roulades are something familiar to me. When I worked as a fish cook, on the menu was a staple dish of Salmon Roulade which was very popular and thus had to be made by me almost daily. The idea is to pound/roll a piece of fish or meat as an even surface and then spread on this surface your ingredients of choice, and finally roll the meat/fish tightly. It's always a fun dish to prep and you can't go wrong with presentation.

Meanwhile, our sage has been very resilient. While our other herbs sort of of died during the severe frost we had, the sage, though sunless and waterless, emerged to be even more leafy this 2010. Ours is purple sage and produced pretty leaves. We've well used the abundant leaves by drying, frying, and of course cooking with.

One of the dishes inspired by sage is my pork roulade. Here's my methodology:

4 or 5 pieces Boneless pork chop
1 bunch Sage - rough chop
1 small onion chopped fine OR shallots chopped fine
1 medium Braeburn Apple or any cooking apple - diced to small-ish pieces
1 medium Pear- diced to small-ish pieces
Salt and pepper to taste

Take your pork chops and between either cling film or parchment paper, pound it with a meat tenderizer or a rolling pin. Sprinkle salt and pepper on both sides and set aside

In a hot pan with about 2-3 Tablespoons of oil, saute your fruits - make sure the pan is hot enough so it sautes and browns and not draws water out of the fruits. Add your onion or shallots. Saute until the fruit is tender but not mush. Take off heat and cool a little.

Assembly: take a spoonful of your fruit mix and make an even line across one side of the pork surface leaving ample space for rolling. Roll the pork as evenly and as tightly as you can. You can skewer with toothpick to hold the shape or tie with butcher twine. Sear the pork in hot pan to brown all sides. Finish cooking in the oven. Make sure the pork's internal temperature is at 150Fahrenheit.

To serve, slice in half or thirds.


Resilient Purple Sage


Pork Roulade filled with Pear, Apple, and Sage

6.24.2010

Strawberries

Strawberries a plenty this year. We planted them last season in 2009 and while it gave us good yield last year, we've got almost twice as many popping up this year.

Today, I was gearing up to make Apple-Rhubarb crumble on husband's request, but when I saw the strawberries this morning, they had to be part of the crumble affair.

Mine turned out more tart than sweet which was OK because the crumble topping was a sweet enough contrast. My recipe version and pictures are below.


Strawberry-Rhubarb Filling:
1 cup strawberries, halved
1 cup rhubarb stalks, tougher skin removed and sliced thickly, about 1/2-inch or so.
Sugar to taste - really taste as you go because you will determine the tartness/sweetness you want.
2 tsp vanilla extract
1 TBS honey

The idea is to do equal parts strawberry to rhubarb, and for the rhubarb, the idea is to cut them fairly thickly so they don't all become mush in the end. Most of the rhubarb WILL become mush, but the bigger the cuts, the more recognizable pieces remain in tact.

Heat a nonstick saute pan and melt about 2 TBS of butter in it. Saute the strawberries and rhubarb. Throw in honey and vanilla and sugar and continue to saute. Taste it, and add more sugar as needed. Set aside

Crumble:
8oz flour
8oz butter
4oz dark brown sugar
4 oz oats - optional

Mix all ingredients until the consistency is of chunky wet sand.

Assembly: Up to you to either put them in individual ramekins or a baking pan, but the idea is to spoon or pour in the cooked strawberry-rhubarb and then top generously with your crumble topping.

Bake at 375-400F until the crumble is golden brown and cool.


Sans Rival

  A very French name for a very Filipino dessert. As a kid sansrival was such a treat. So decadent, so buttery, salty, chewy, and crisp. Whi...